Sunday, December 16, 2018

Kegerator v1.0

A local brewery, Four Generals, makes a fantastic milk stout called Buddahed that took gold in this year's Washington Beer Awards. Last year, as their supply was waning and I had the dry summer months looming, I mused that perhaps I should have gotten a keg to tide me over. Andrea, being awesome, told me to buy a kegerator and a keg to go with it this winter. As luck would have it, a friend of mine owns a good deal of homebrew equipment that he couldn't take abroad with him on a few year assignment. So I am now the steward for the next few years of two corney kegs and a CO2 tank. With that, I decided to try my hand at making a kegerator and setting it up.

The first was to refill the CO2 tank. A 5lb tank should last two kegs, according to the salesman, though no indication as to whether that's two full kegs, two half kegs, two sixth kegs, etc., but we'll find out. It cost $17 for a trade-in tank.

The missing piece -- the kegerator -- turns out to be a few hundred dollars and makes the financial aspect of a residential tap less palatable. But I found a wine fridge (which is bigger than a typical apartment- or dorm-style fridge/freezer combo) on craigslist for free that really just needed some TLC and some work on the thermostat.

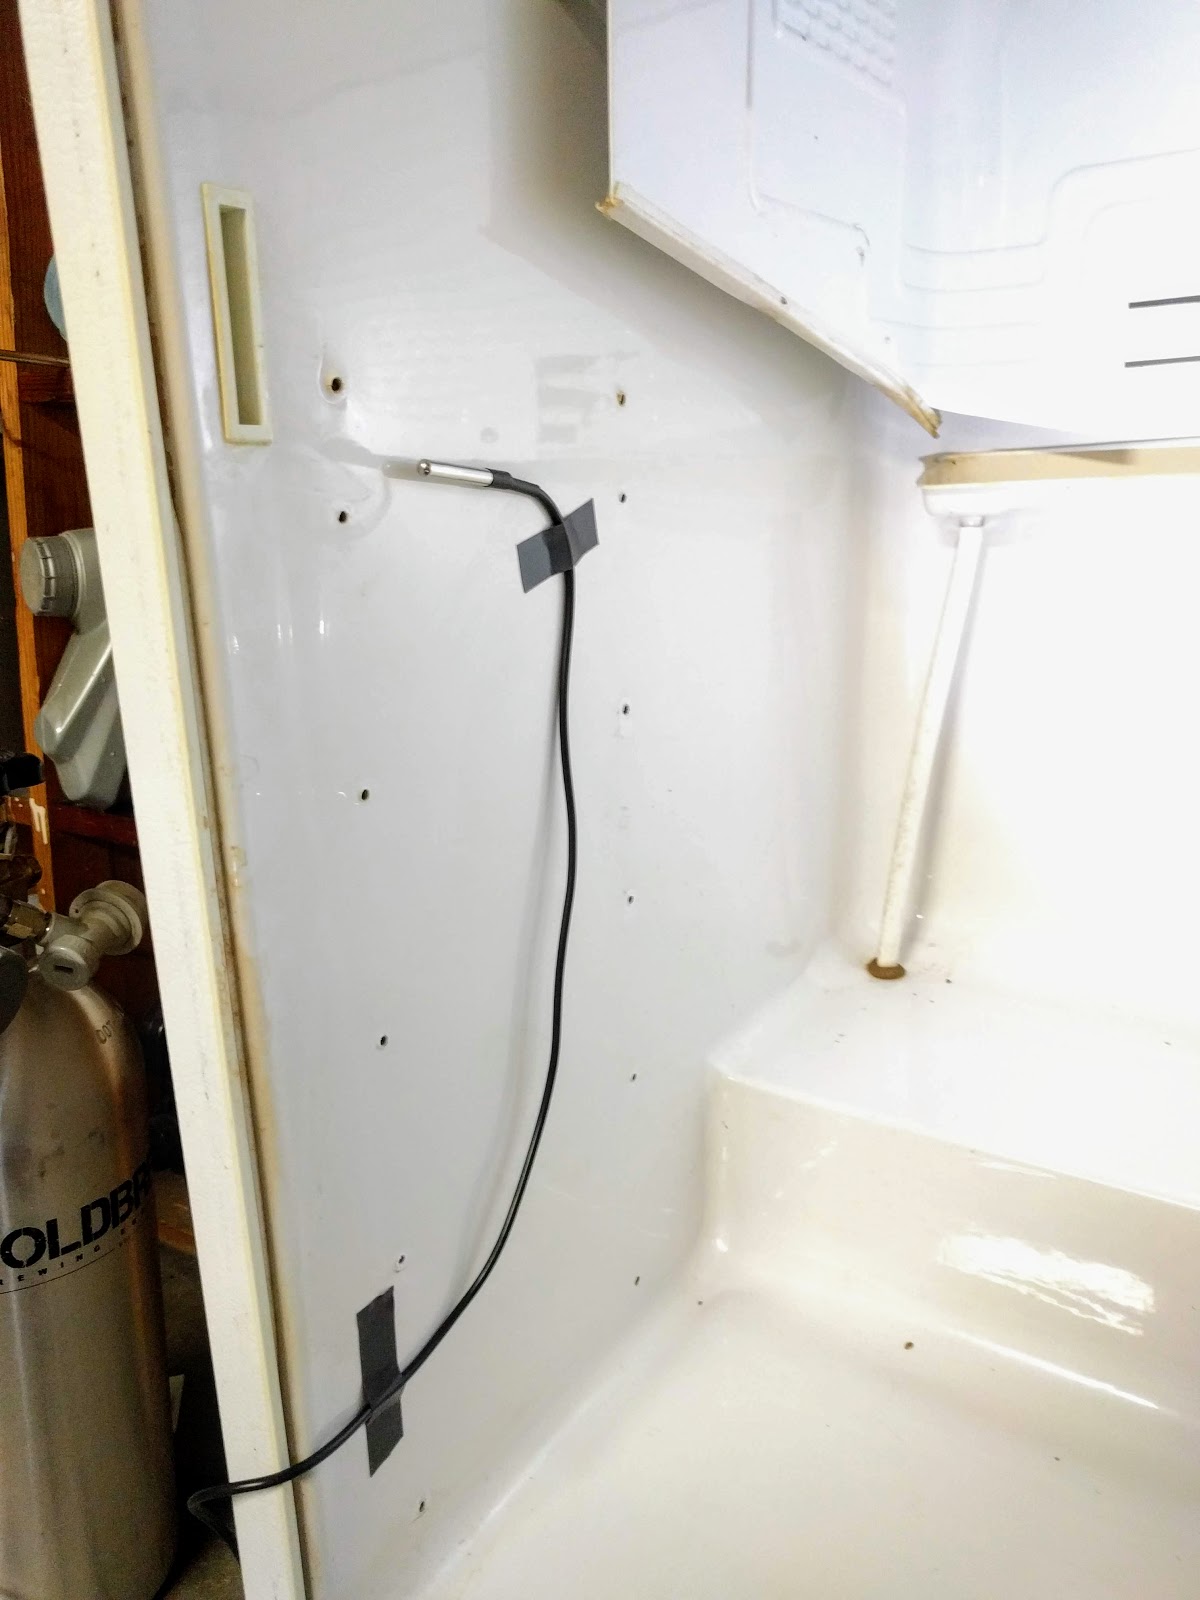
I picked it up for the cost of gas to Redmond, brought it home, and started playing with it. The thermostat, even on full cold, didn't get the fridge less than like 55°.


I disconnected the wires from the thermostat (above, with the quick disconnect ends) and connected them, and within an hour, the fridge was well below freezing, so I knew it worked okay. According to some research I did, beer is "ideally" kept at 38° (though a discussion I had this morning with one of the guys at Brewhouse Provisions in Redmond said that stout is typically upper 40s or lower 50s). The problem, then, is how to replace the thermostat. I didn't really want to just get another plain old thermostat (even though that would have probably been the prudent thing to do) -- this is an opportunity to do something interesting.

Instead, I bought three Arduino Nanos for about $12, a pack of six relays for about $11, three thermistors for $9, a pack of LEDs and resistors, some protoboards and breadboards, and probably a few other things. Having never done much soldering or EE work to speak of, designing the extremely simple electronics was quite a bit of work for me. Both the kitchen table and my hands had some burns from the soldering iron:


In the end, I was able to wire up a thermostat that functions.


The software was a lot easier. (Code available here.) The basic idea is:
  1. Using a thermistor, read the temperature inside the fridge.
  2. Give a visual indication of the inside temperature: red for temperatures above the desirable range, blue for temperatures below, and green for the Goldilocks zone.
  3. When the temperature is in the red, kick on the relay for the fridge, starting the cooling process.
  4. When the temperature goes into the blue, turn the relay off.
  5. When the temperature is in the green, do nothing.
I got it all rigged up and tested in (and out of) a glass of ice water:


The visual output indicating the temperature is too warm (left), too cold (middle), and just right (center)
With a functioning thermostat, I started installing it in the fridge. As of now, I'm not drilling any holes in the walls, so I taped the thermistor to the inside wall:


Side note: My soldering and wiring was so terrible that every component except the blue LED failed at some point, and I had to re-solder everything. I consider this a lot like writing code: when you're a new programmer, you write terrible code. But the next project is marginally less terrible. Eventually, your code only kind of sucks, and you get to consider yourself a professional.

After the installation was more or less stable, I hooked up the laptop and started getting temperature readings. My software polls every five seconds (because more frequently isn't needed, and why not every five?). I opened the serial monitor and started collecting temperature measurements.


After about an hour -- when I was tired enough that I was ready to go to bed -- I copied the serial logs and plotted the temperature. At the time, my code was set to have a desirable range of 36-41°F. At the beginning of the readings, the temperature was roughly 60°. I grabbed the sensor to warm it up slightly, but it pretty quickly cooled down. After hitting the low end of the temperature range, the relay kicked off and the fridge slowly warmed up over the next half hour:


So the thermostat was successful, and next was a trip to Brewhouse Provisions to buy a D-type Sankey keg connector because, as I discovered, the Corney kegs I have are a different connection type. Then off to Four Generals with Reed to buy my keg. (This should have had a picture, but I neglected to do so.) About $92 for a 1/6 barrel (plus deposit, but that's refundable, so I won't count it). And finally, back home to put it all together.

Hooking up all the hoses and fittings was super easy and nothing particularly interesting to document.


My overall list of items and costs are as follows:

ItemCost
Half CO2 tank(?)$8
Arduino Nano$4
Relay$2
Temperature sensor$3
Miscellaneous electronics$1
D-type Sankey keg connector, hose, fittings$67.30
1/6 keg$92
Total$177

With a little luck, all of the equipment will survive, leaving me with an average cost per pint of about $2.40. A bigger (1/2 barrel) keg will bring this cost down to roughly $1.50/pint.

Sunday, December 9, 2018

Belated Thanksgiving in Minnesota

Last year was our first time staying in Seattle for Christmas, and it was fantastic. This year, we decided we'd do the same, but we'd visit family for Thanksgiving instead. When it came time to buy tickets, we found that we could save a substantial sum if we delayed our trip until after the holiday, and, to boot, it would make the planning a bit easier for visiting families and friends.

The trip through SeaTac was itself an adventure with the boys loving the moving sidewalk.


We started off at Andrea's parents' place in Clearwater, where we visited them and our sisters-in-law and their families. 
Jake and Riley playing on the stairs

 The boys loved to snowboard down the hill outside my in-law's house.


Meanwhile, among other things, I often stayed inside with Parker and others.


All the grandsons often played together, drew/colored, etc.

Since it's so much colder there than it is here in Seattle, we weren't particularly well equipped for the cold, so Andrea bought new winter jackets. Jake loved to bundle up in his George Costanza coat.

At my parents' place, we went out a few times on the lake with the four-wheeler pulling the boys on their sled. Hanging out on the lake was fine, but as soon as there was any wind, it got pretty biting cold. Luckily, we were reasonably protected.

On a side trip to Duluth, Andrea and I visited my good friend Luke, who now works at Bent Paddle Brewing and thus got me a good deal of fantastic stout.

Their keg cooler is something to aspire to.

We did some more sledding and projects at my parents' house together -- more photos to come on the black walnut tables Dad and I started on.

And finally, the return flight to Seattle.

Sunday, November 25, 2018

More things in November

More stuff from the last week or so!

Beaujolais Nouveau with my French group - so I made some chocolate-dipped madeleines and French bread. Miam.


A colleague brought in frosting piping stuff and taught a bunch of us how to pipe like a pro. I apparently didn't get that memo. 


I purchased a cheapy "smart" LED and started playing around with programming it. 


Time for our annual gutter cleaning and putting lights on the house. Jake helped me rake the roof off, which is now apparently a thing we do. Pictures of lights soonish.

Finally, Four Generals has my Buddhahed milk stout, so we went there to celebrate and to play Bananagrams. Reed and I, playing as a team, started the round with MEGACAT, but Judges Andrea and Jake -- who also happened to be our opponents -- ruled it not a word.


Meeting in the Microsoft treehouse!

Sunday, November 11, 2018

Another week in November for the Shireys

This week for us:

Another 5k at work with coworkers. I've been meaning to get a picture of the Sasquatch Crossing sign on our trails for a while.


Finally got my sous vide device out again for some beef tenderloin. It was fantastic.


We were running low on green coffee beans, so I bought a bunch of them. Eight pounds worth.


And I roasted a full pound of them over the course of an hour. I was curious how much moisture weight is lost, so I did a very rough calculation. The "one pound" bag of unroasted beans was 497g (1 lb 1.5oz). After roasting (and a little bit of spillage), they were about 420g - and, to boot, had expanded a bit and no longer fit in the bag. That's about 15% moisture loss (again, some of which was actually spillage).


We also did the first of (hopefully) many family training hikes in preparation for all the walking we're going to do in France and Italy. The four of us went to Little Si for a hike of a bit more than five miles (once you account for all the extra climbing on rocks and whatnot that the boys wanted to do).


Monday, October 8, 2018

DIY Coffee Roasting

I recently grabbed a coffee with a former coworker of mine to catch up. Among the many things we discussed was his enthusiasm for home-roasting coffee, which intrigued me as someone who occasionally brews beer and who regularly drinks coffee. (Thanks go to Mike on the former; blame goes to Andrea for the latter.) So I figured it'd be an interesting thing to try, and given the super useful info and pretty cheap goods from Sweet Maria's, I was able to get started for little green and in little time.

The super cheap way is to use a standard popcorn air-popper (of a particular design), which Sweet Maria's sells along with some sampler beans. Roasting outside to prevent mess and smell inside, I got setup behind the house:


It's crazy simple: put a small amount of unroasted beans into the air-popper and turn it on.


I had an apprentice roaster to help me monitor the process:


After only a few minutes, the beans started moving around more easily due to the moisture having been burned off; the chaff from the beans started coming off; and we started getting our City roast (with an audible crack).


After about six minutes, I stopped the roasting to cool off the beans. Being my first go at the process, I opted for under-roasting rather than over. Here's the color comparison between the smallish batch and the original green bean.

I did this three times at approximately the same time:

This gave a pretty light bean:

Protocol is apparently to let these off-gas their CO2 for the next few days, so we'll be trying these out fairly soon.

Sunday, August 12, 2018

The start of a Kindle cover

I recently bought a Kindle to replace my very old Sony E-Reader, and soon after I figured I should have a cover for it. Rather than buying one, I thought I'd try my hand at making one -- out of steel -- so yesterday, I ran over to a local metal supplier to get some scrap, and I set out without much of plan to see what I could make.


I'm not quite done: I still have to add some sort of elastic bands to pull the Kindle in-place, and maybe I'll do some sort of decorative etching on the cover as well.

Sunday, July 8, 2018

What it costs to summit Mont Blanc

Last year, after Andrea's and my trip to France, I wrote a post breaking down our expenses. Since I just got back from France to climb Mont Blanc, I thought I'd do the same thing. My trip consisted of a few days of getting ready, eight days of mountaineering, then a week of visiting a few friends. My expenses break down as follows:


Beer/coffee$136.56
Climbing$199.67
Fees$67.11
Food$238.14
Gear$407.31
Gifts$125.39
Guide$4,823.26
Lodging$1,639.67
Misc$102.60
Tourism$65.62
Travel$1,575.47
Grand Total$9,380.79


A few quick notes:
  • Beer/coffee represents beer, coffee, small snacks (eg, a croissant), but not quite a meal
  • Climbing covers fees, mostly for cable cars up the mountains
  • Fees are currency conversion, money transfers, etc.
  • I bought gear (crampons, ice axe, helmet, etc.) rather than hauling it across the world
  • Aside from plane tickets, travel was crazy cheap this time, having no need for a rental car. I used BlaBlaCar, Flixbus, and SNCF train.


Yet again, travel and lodging are some of the biggest factors; though this time, paying someone to keep me from dying on the mountain was by far the biggest factor. Having been armed with the previous trip's analysis, I knew this time that going out to eat and buying souvenirs was a fraction of what I would spend, so I didn't hold back too much on those.